it's been forever and a half since i made a tutorial..
don't forget to subscribe!..thank you!
Showing posts with label make up tutorial. Show all posts
Showing posts with label make up tutorial. Show all posts
Tuesday, March 24, 2009
Prom Look Tutorial
Sunday, April 20, 2008
Heatherette Tutorial (pic heavy)
i did this awhile back, but only posted it on Specktra.net..but since i've been gone for like forever, i figured i needed Copy/Paste's help..lol
Products Used: all MAC unless otherwise stated
FACE:
Mineralize Satinfinish NC 37
Studo Finish Concealer NW 30
Blot/loose powder in Medium Dark
Maybelline Mineral Power Concealer
Eyes:
Bare Study p/p
Other Worldy p/p
Heatherette Trio 1
::Mood Ring
::Cloudburst
::Hoppin'
Pink Pearl pigment
Dual Edge Pencil
::Pop BLue
::Black Funk
L'oreal HIP liner in black
Maybelline Define-A-Lash black
NYX Suede e/s (brows)
Cheeks:
Accentuate/Sculpt (contour)
True Romantic BPB
Shell Pearl BP
Lips:
Lollipop Lovin' l/s
Bonus Beat l/g
Let's get started..
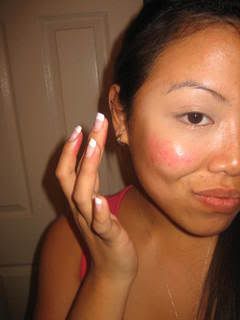
Start with a clean, moisturized face, as always..
Conceal dark under eye circles (i blend Maybelline and MAC together with MAC 194 brush)
Now, apply your foundation with MAC 187 in stippling motions, then light buffing to get rid of streaks
Foundation and Concealer-DONE! (i didn't set with powder yet, i want my foundation to remain malleable until i'm almost done with the eyes)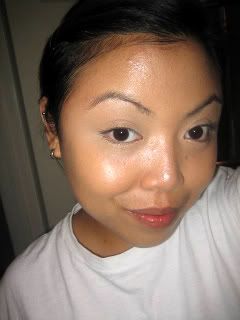
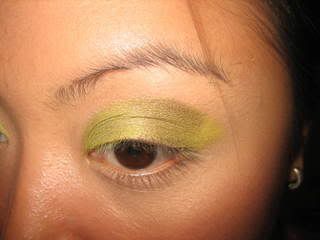
i applied Bare Study p/p all over the lid (i used MAC 252)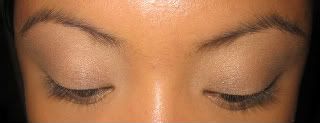
Then i applied Other Worldly p/p on lower half of the lid as base for mood ring e/s with Studio Tools concealer brush (this will help intensify mood ring e/s)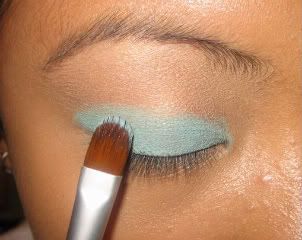
i then applied mood ring e/s over Other Worldly p/p with a MAC 239 brush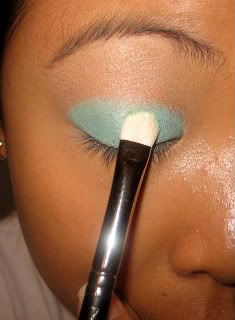
it should look like this..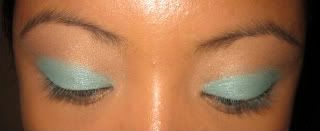
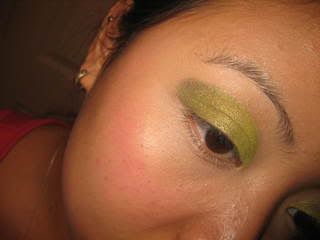
then with a MAC 219 pencil brush, i applied Cloudburst in the outer v and in the crease half way..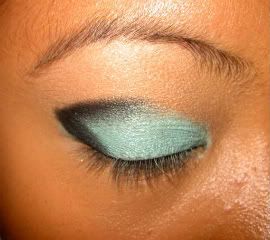
'un'blended, it looks like this..
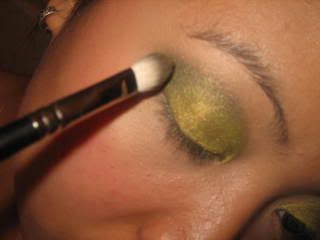
Now blend and soften harsh lines with a MAC 224 blending brush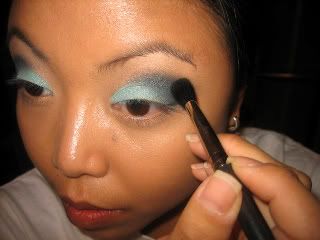
it should look like this so far..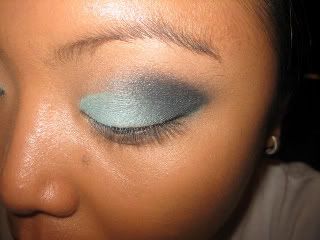
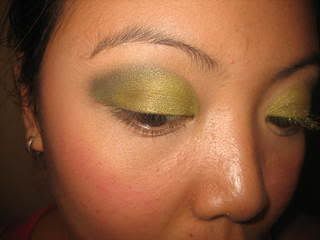
Now take another blending/crease brush, sweep Pink Pearl pigment onto the crease, blend with cloudburst, this will also help soften cloudburst more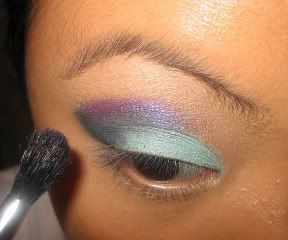
like this..
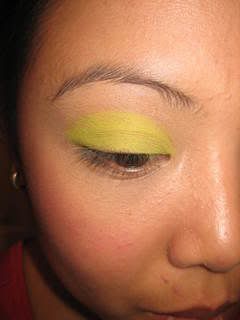
Now apply Hoppin' e/s with a 239 brush (sorry for the blurry pic)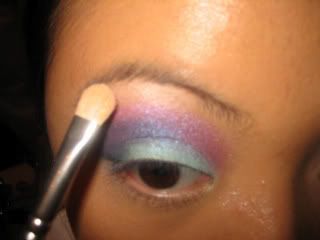
i now fill in my brows with NYX Suede e/s using a Sephora #10 brush
then i lined my upper lash line with L'oreal HIP cream liner in black using MAC 208 angled brush
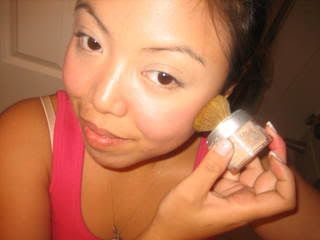
before i proceed further with lining my bottom lash line, i set my foundation with blot/loose powder using a MAC 150 powder brush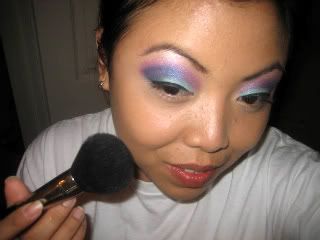
then now i proceed with lining my bottom lash line with soft sparkle pencil in pop blue (this will act as base for pink pearl pigment)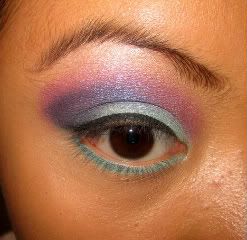
with a pencil brush i applied pink pearl pigment on top of pop blue pencil (blended, it looks more purple than pink)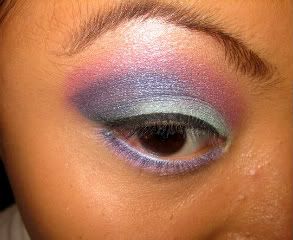
i then lined my waterline with Black Funk pencil (uber soft and creamy)
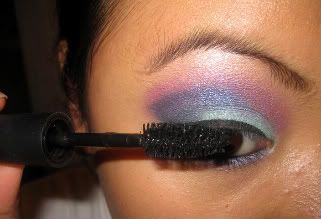
I curled my lashes with Shu Uemura lash curler then applied Plushlash in Plushblack
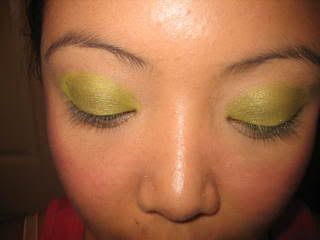
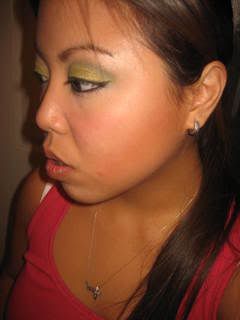
This is how it look so far..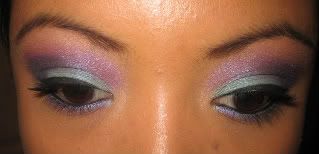

let's move on to the rest of the face..
i applied True Romantic BPB using a MAC 138 brush=LOVE!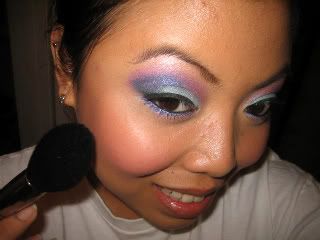
i then contoured my cheeks with Sculpt powder using MAC 168 angled contour brush
Now the lips..
i applied Lollipop Lovin'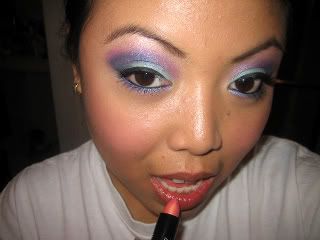
then Bonus Beat l/g for extra shine
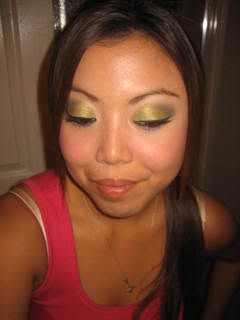
DONE!!..Cam-whore away..
i think squishy faces are very flattering..lol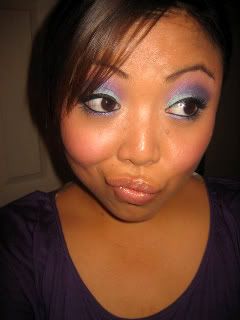
when in doubt, pout!..
and then cheeze it!
I hope this makes up for my long absence..i have another entry that i still have to finish..i'll probably be able to post it later tonight..i missed all of you!..
♥
MaNdiLiCiOuS
Saturday, December 22, 2007
Smoky Green Tutorial
Ok i was bored this morning, meaning i had enough time to upload, edit and post all the pictures..Btw, i give props to the ladies of Specktra who take the time to do picture tutorials because THIS IS SERIOUS WORK..lol..ok so on with the tutorial:
Products used:
Face:
L'oreal Bare Naturale in Nude Beige
Maybelline Coverstick in Light Beige
Revlon Pinch Me in Cheeky Cherry (liquid blush)
Wet N' Wild Bronzer (contour)
Nichido loose powder in So Natural
MAC New Vegas MSF (highlight)
Eyes:
Pharaoh p/p (base-lid to crease)
Charlotte Russe Minerals (shades of greens stack)
- 1st pot on inner corners
- 2nd pot on mid
- 3rd on outer v
MAC Black Tied e/s (outer v *on top of the 3rd color* blending onto the crease)
MAC graphblack technakohl (upper lash line-guideline for liquid liner, lower lash line)
Maybelline Waterproof Liquid Liner (upper lash line)
Maybelline Great Lash Blackest Black
Lips:
Chapstick in Strawberry
MAC Viva Glam V (i think it already faded though)
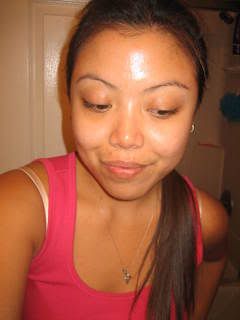
1. Start with a clean moisturized face:
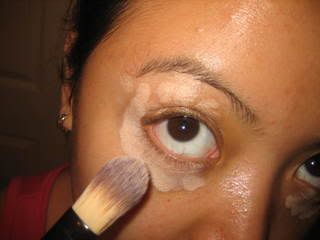
2. Apply concealer and blend with a concealer/foundation brush
3. Next, apply liquid blush then blend with finger (dabbing motions)
i apply blush before foundation because it's liquid
4. Then, buff on mineral foundation
5. Next, the eyes: apply MAC Pharaoh paintpot on entire lid as base
6. Then apply 1st color *which is the first pot of the stack* on the inner corners (1/3rd of the lid)
7. Apply 2nd color *2nd pot* on the middle (2/3rd), leaving enough space for the next color
8. Apply 3rd color *3rd pot* on the outer v
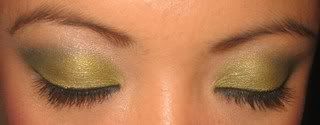
9. Using a 217 brush or any crease brush, i picked up black tied and applied it on my outer v blending it towards the crease..
Then you'll have this:
10. Line then apply mascara.
Then i'm DONE!..with the eyes..lol
11.Contour face
12. Then swipe New Vegas MSF to highlight cheeks, t-zone and chin (not pictured, sorry i forgot..lol)
13. Apply lip moisturizer then your l/s or l/g then now i'm really done..
Please refer to this link for other photos.
i'll be posting swatches of the Charlotte Russe Minerals, so keep on checking back.. Thanks!
Subscribe to:
Comments (Atom)
